VOIDBREAKER 05

Hello again traveler, and welcome back to another intermittent attempt at a regular posting schedule. Currently trying to optimize this space to actually function in other capacities than a photo diary. But I’ll cross that bridge as soon as I come to it. It’s been quite some time now since I prepared most of this article. It was meant to be more of a pictorial approach as I hope will be obvious. Ill try to explain more in depth in the coming words so bear with me.
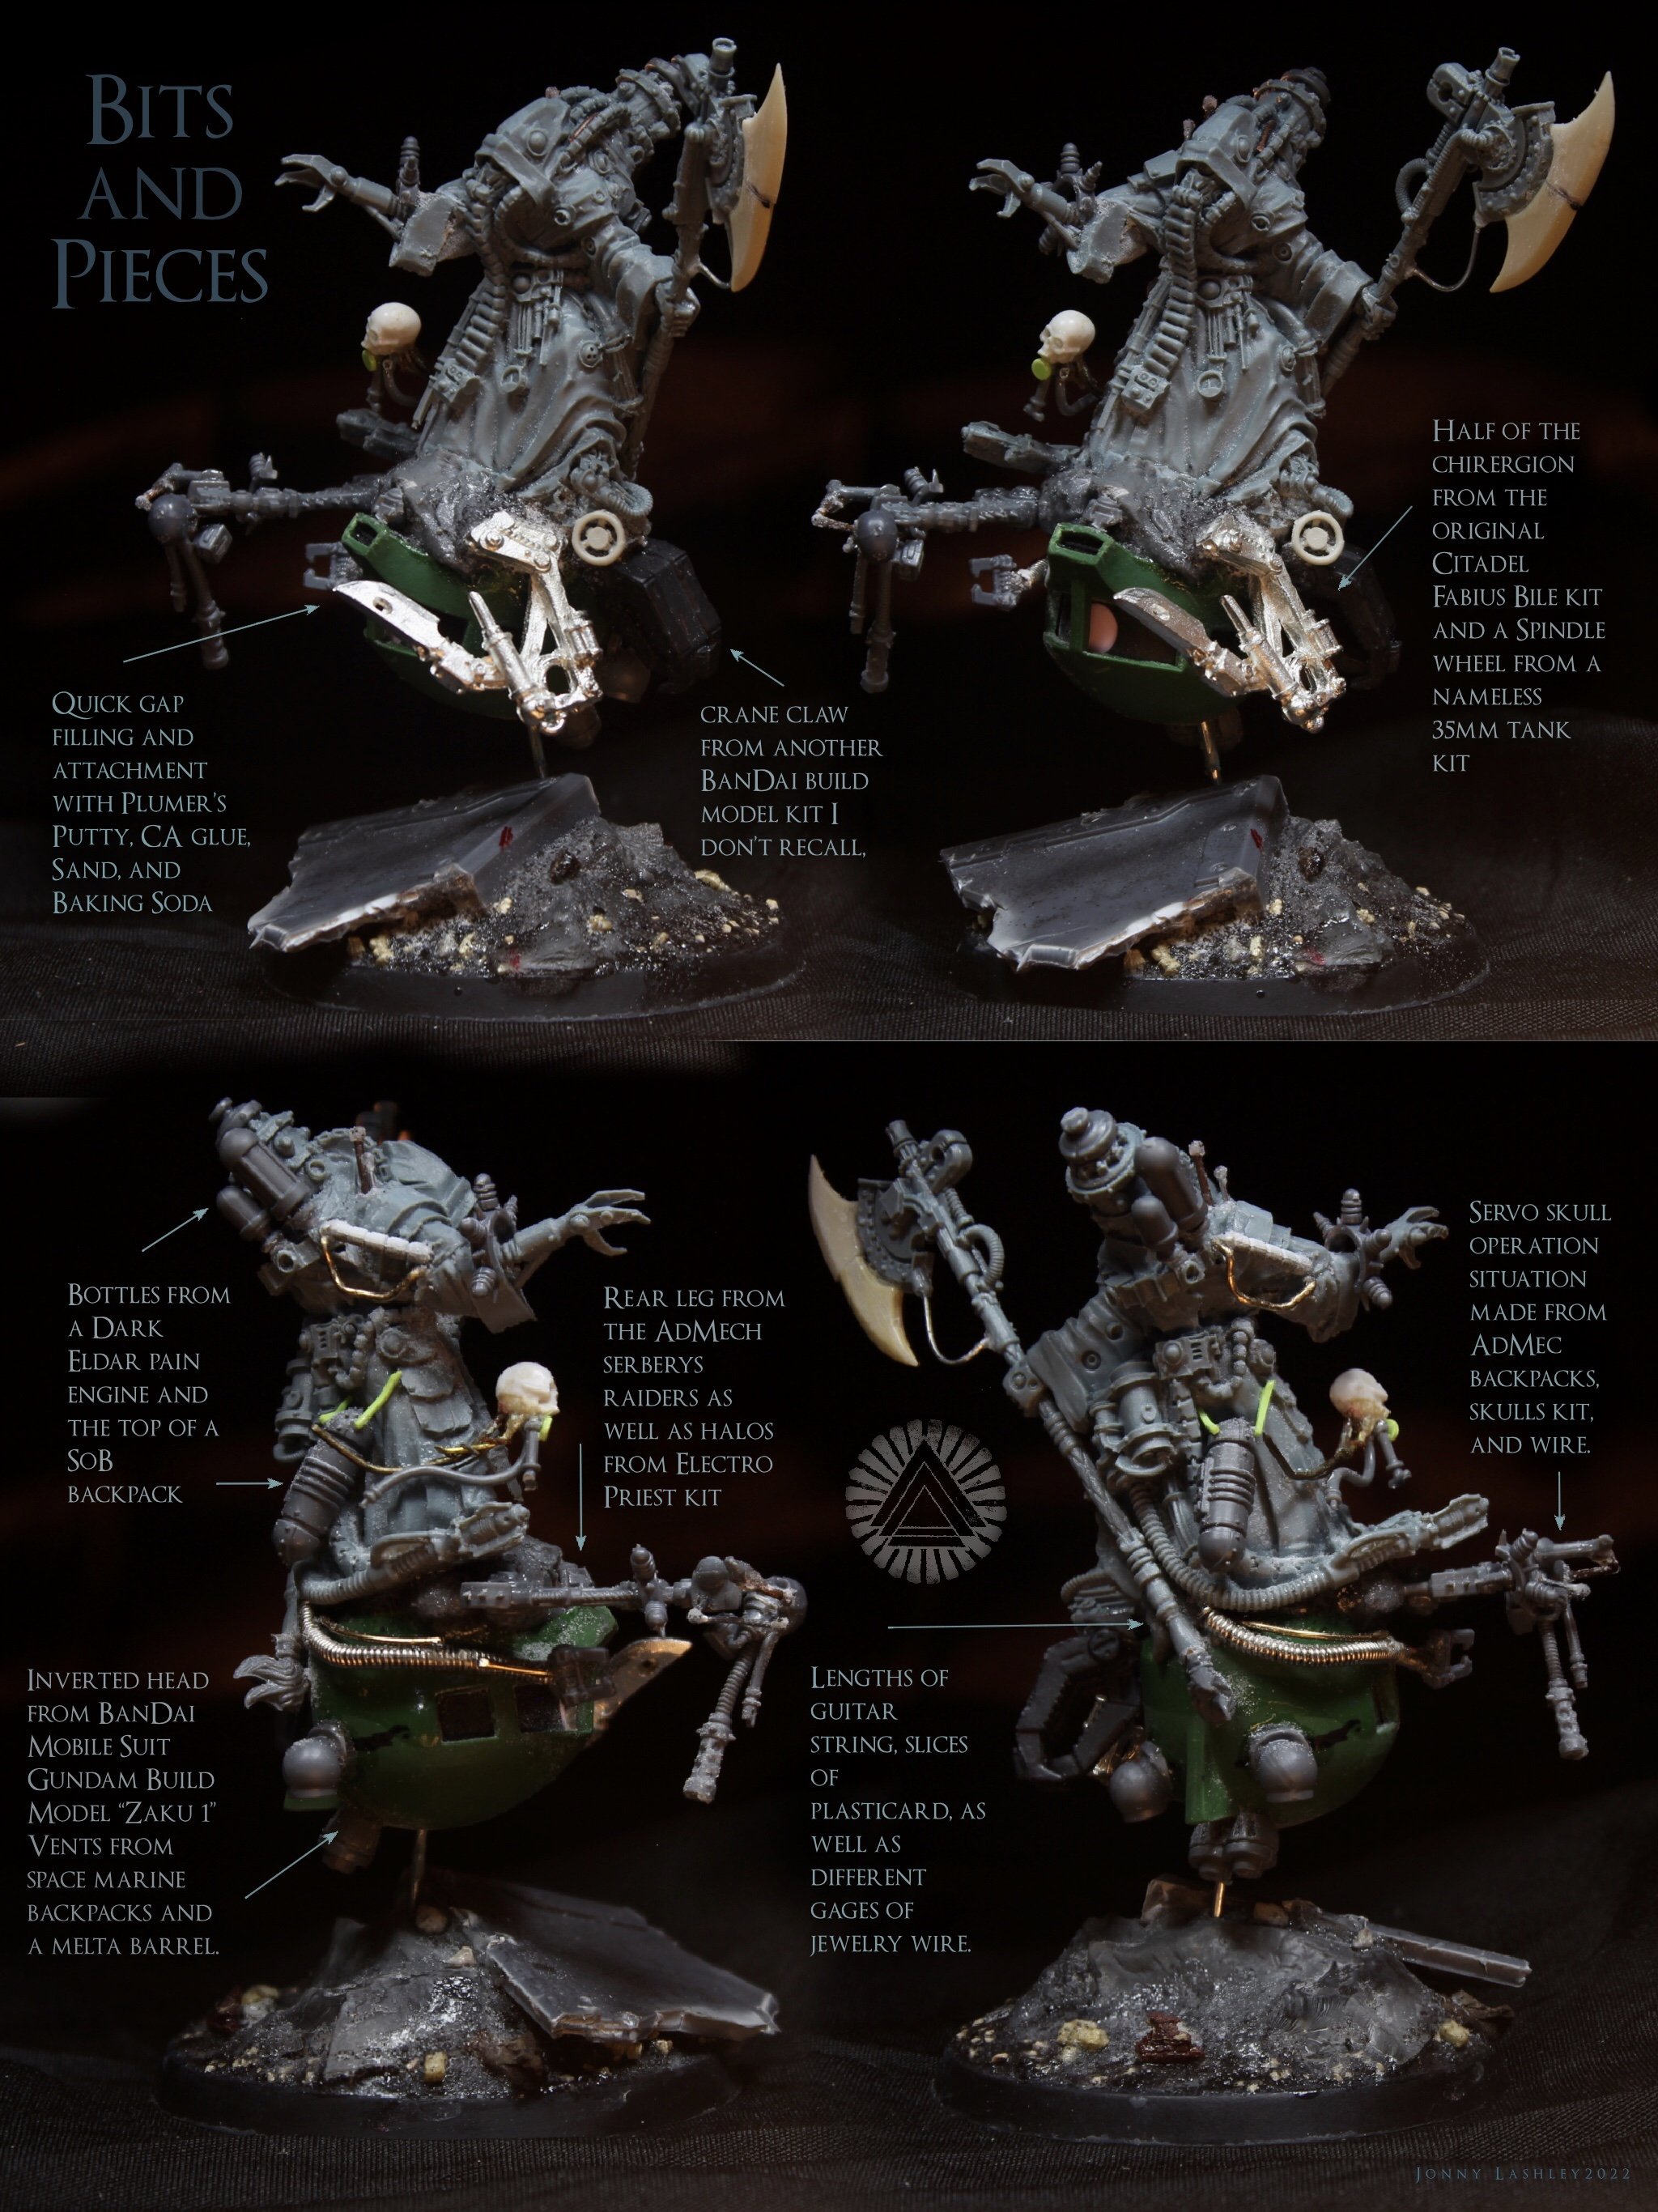
Like I said previously, quite some time ago now, I wanted to build and paint something quick and fun. This was one of those projects that was built between three or four others as quick sketch after work for a few hours or if I needed a break from some other pressing task. I usually have a few of these going at all times and I’m not surprised they become a super helping of fun. I’ve wanted to start building some Magos type characters that would fit into the whole loose YOD deathcult narrative. I would assume a huge, nefarious, evil rouge trader backed deathcult would have some sort of connection to a Mechanicus element. I figured, why not something that makes all those creepy assed skulls with no eyes I keep putting on stuff? The base model here is a sneaky Forgeworld Magos chopped up quite a bit. I came across it in a bit lot and had no problems hacking into it. Here are some shots of it with all the other toy bits I’ve glued on.
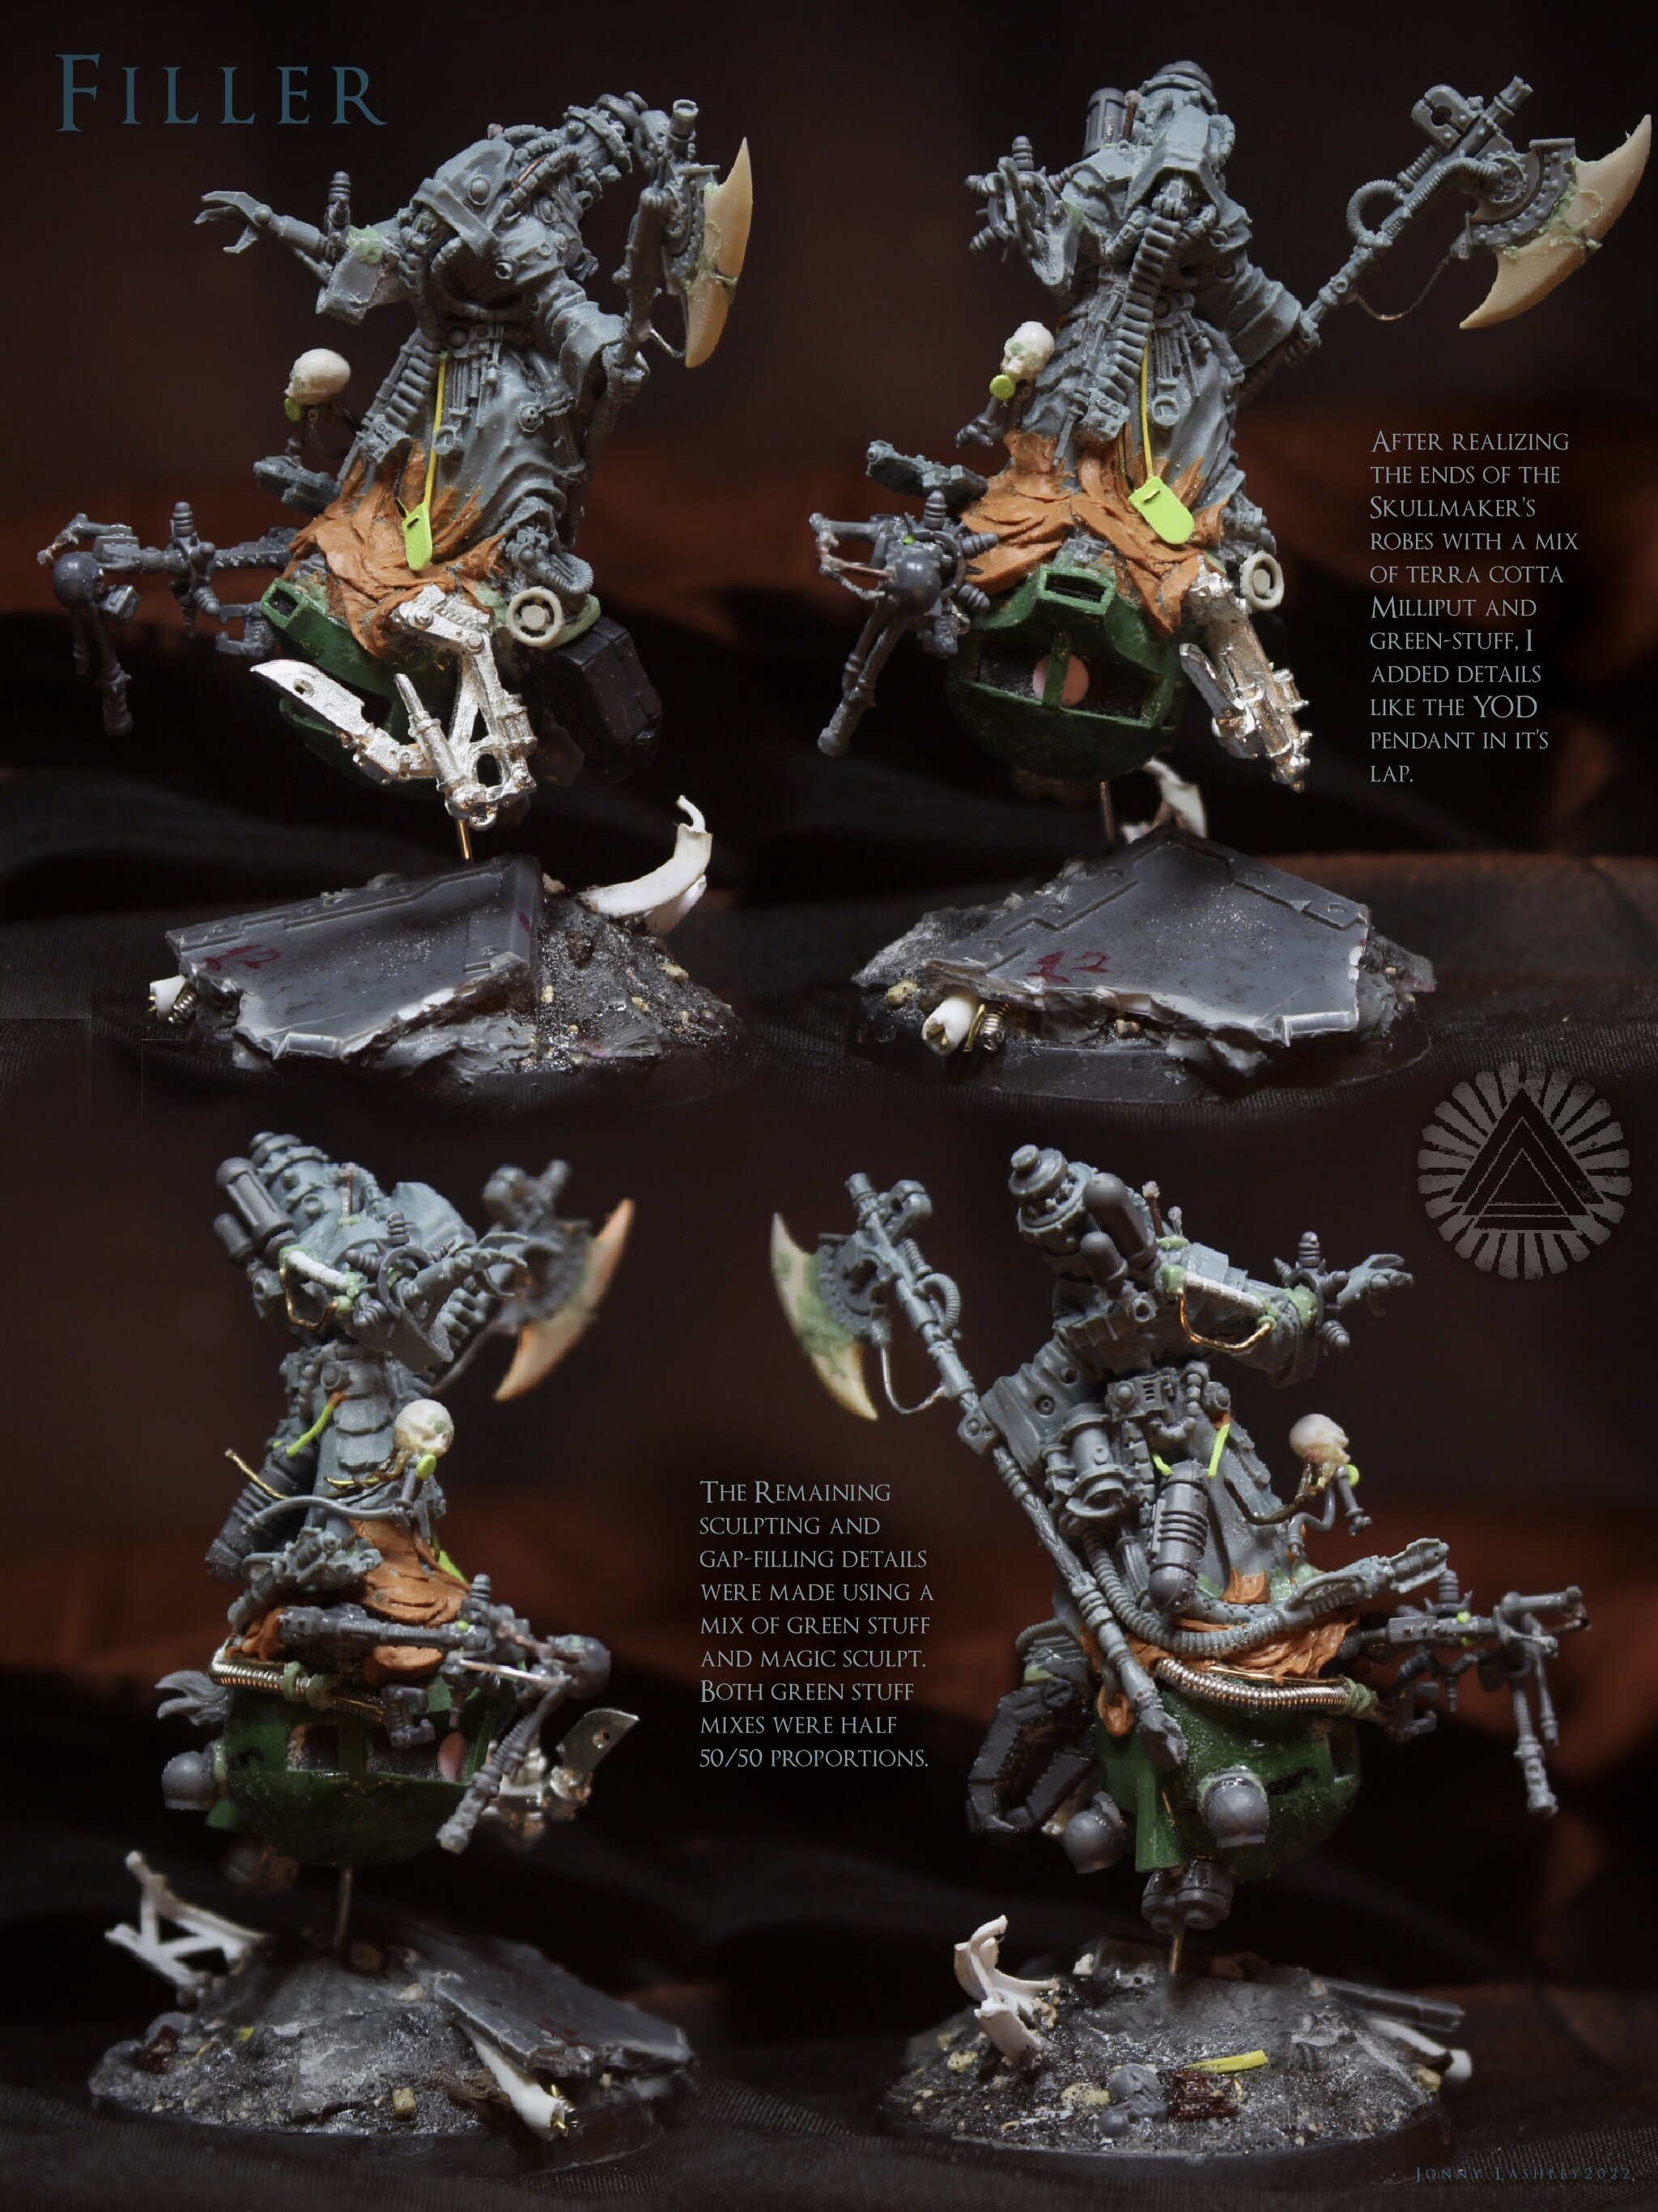
I cant really tell if I hate using greenstuff sometimes or I’m just terrified of it. I always try to take care of as much as I possibly can with wires and card and bits before I have to mix up any putty. Same priorities apply here. This time i went for two rounds of sculpting. The first round I ironed out most of the fabric details with a mix of Green Stuff and Milliput. It’s orange because I used the terra cotta type. I added a few more details over the newly sculpted area. On a happy note , I’m sure they help cover up any errors I no doubt made in the orange putty. The second round was to smooth out a few wire connections and gaps that were too obvious.
After all the putties had fully cured I covered the model in the usual generous amounts of texture paste and crackle medium. I’m seeing people do this step after an initial prime so the crackle paste doesn’t chip off as easy. I’m curious to try this in the future.

So this is the model after the basic recipe is applied. After the zenith prime and some ink washes I used an Oil wash I’ve been using on some Black Legion stuff. (Cassel Earth and Black) )It’s really just leaning on shading a blue grey with dirty purple to lean on the melancholy look of the black. The base tones on the fabrics are Paynes Grey over the zenith black and grey prime so the Cassel Earth just helps shade and accent the dark robes. I’m pretty sure I blocked out the metallic areas on the model with a dark umber ink and matte medium before i applied the first oil wash. After that had set-up roughly applied the metallics with a few different Vallejo True Metals , P3’s Orgoth Bronze, and Scale75 Peridot Alchemy. A large part of the metallics are a burnt and rusty black metal. This can be done on black or metallic based areas, A few sloppy crevice washes of an orange brown and and a brighter orange will do the trick, then lightly drybrush with a black. Make sure the crevice washes have dried first. You can lightly drybrush those areas with a dark metal paint but I don’t think its completely necessary to sell the effect. I think there were a few other areas that were also base-coated in this stage but its just simple things like skulls and leather. From here I was able to add my object source lighting.
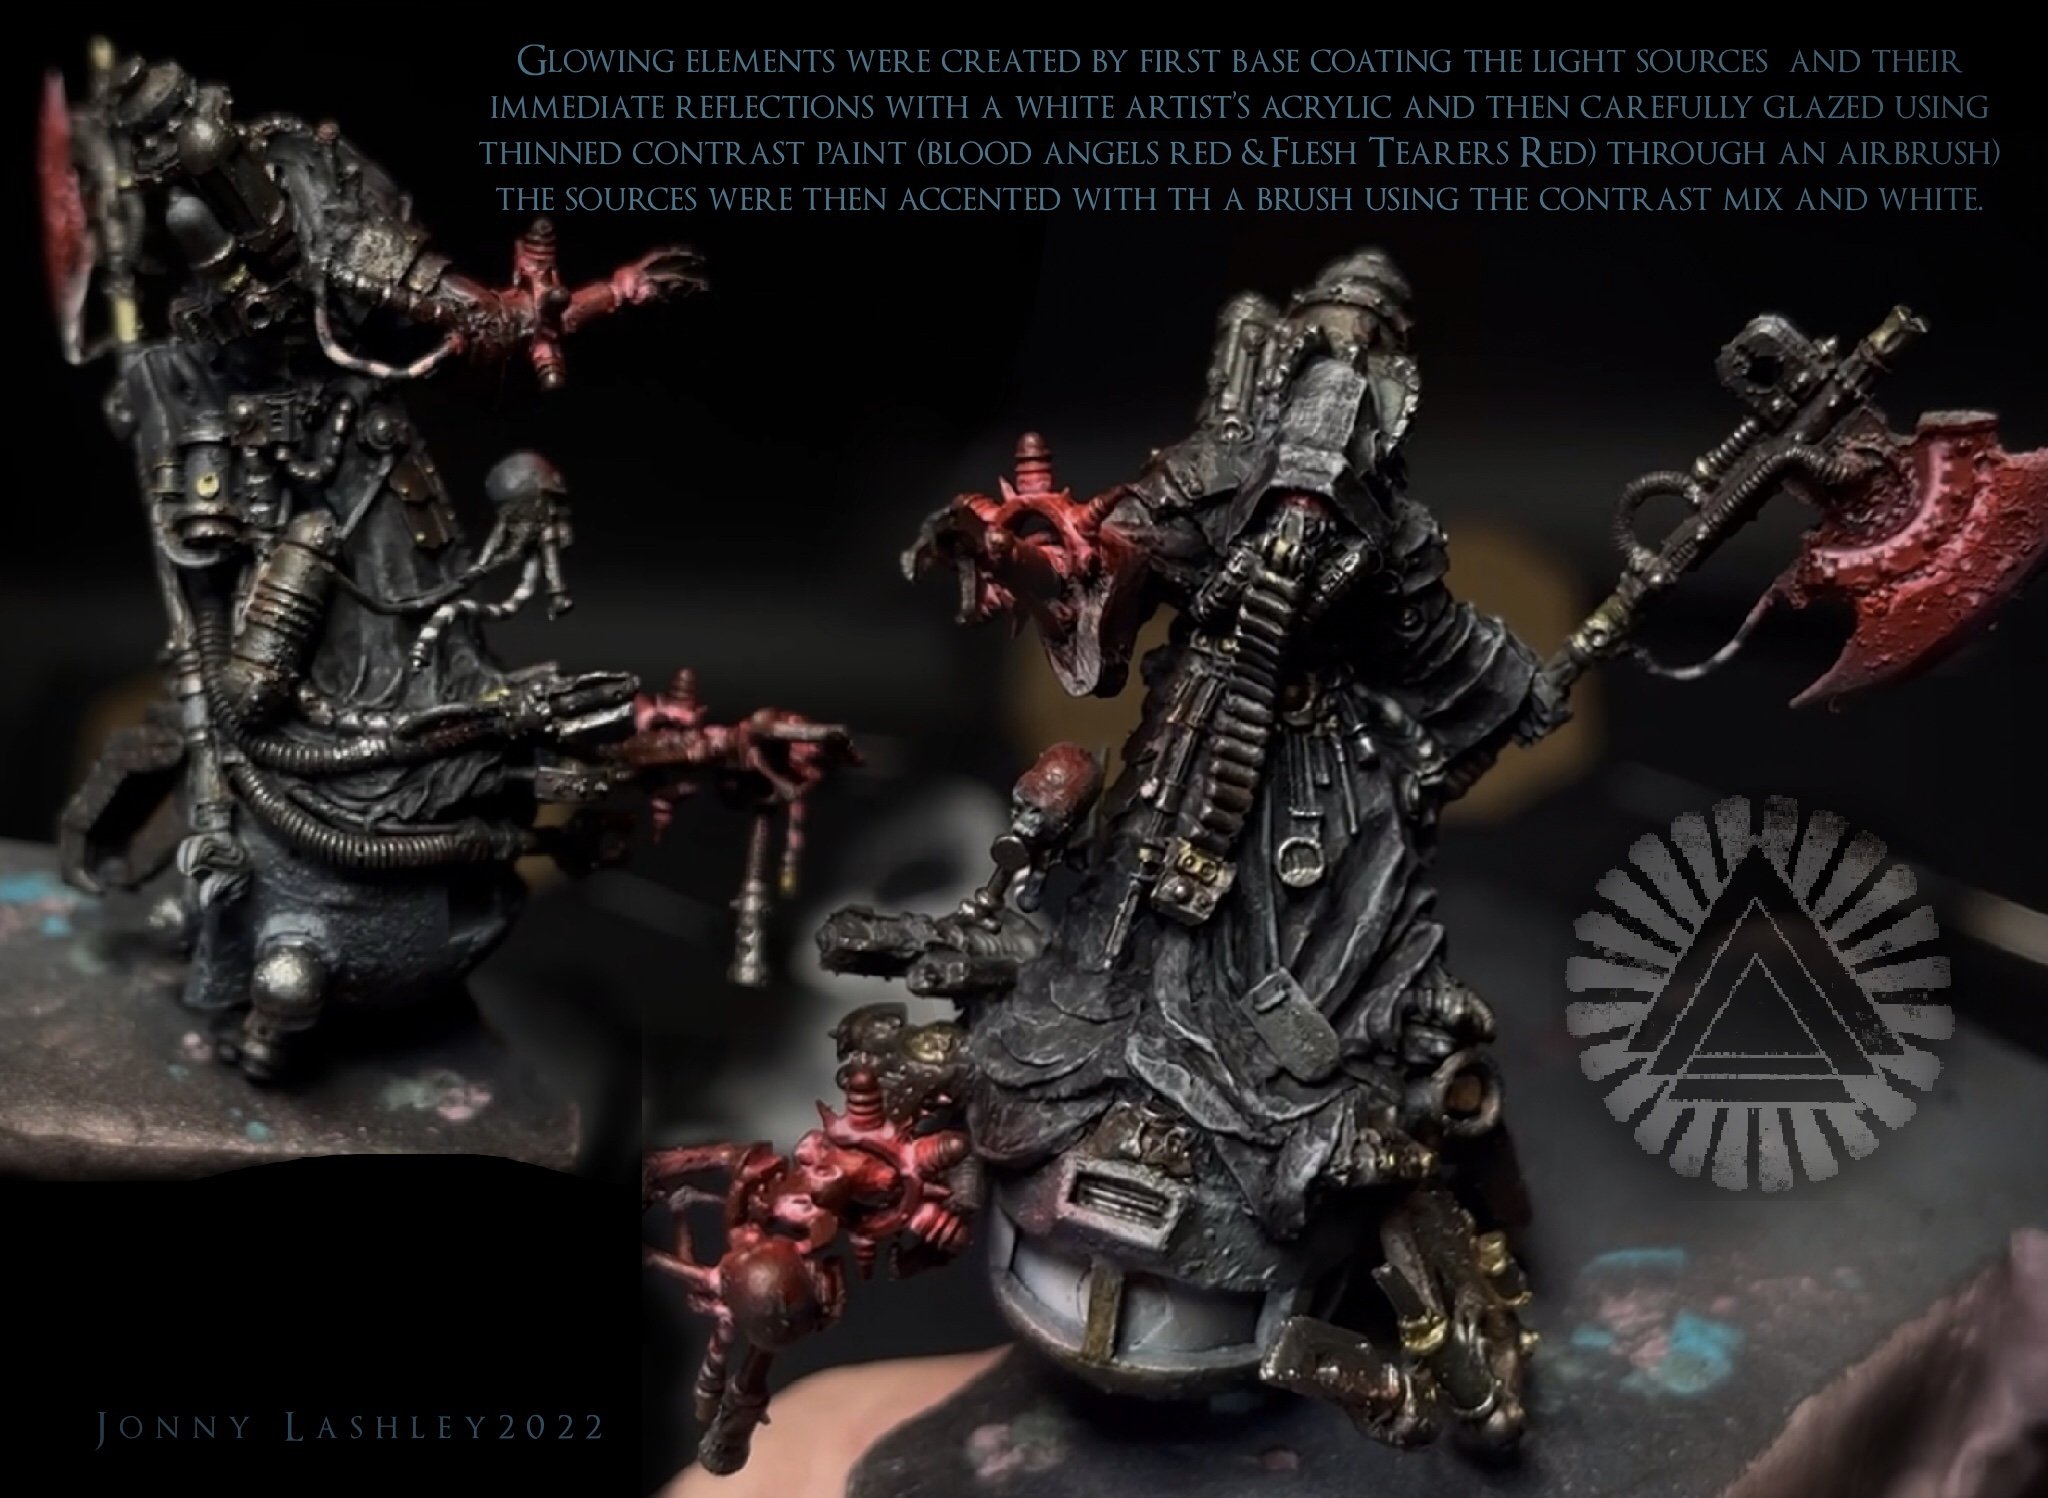
I also added some glow from the the openings at the bottom of the characters floating throne. Various enamel weathering products were applied after the main red glowing areas were completed. I got a chance to use Dirty Down’s Rust product on the under side of the Magos’ carriage. This stuff was great and I cant wait to use it again. The skulls being created and accompanying the Magos were accented using metallic medium and Tamia Clear paint to represent the evil spirit being inserted into them.

These are some of the finished shots of the SKULLMAKER completed. There are some more shots and tiny tidbits of a non existent story on the Instagram profile. If you don’t already follow, consider checking it out. @witchhammerstudio (started a TikTok under the same name recently) I post lot of real time progress there an there are movies. I’ll be back quick as hell as Im setting up some cooler stuff for this site as well as some more of my 2D artwork. I hope you float back through to check it out soon.