Slugwizard:part two
Last night after work I jumped back in on our slug boy. Adding some of the basic ridges to the slug body, building a head structure and starting the base.

Using copper wire as structure for all the classic tentacles of a slug face.
Layering a lot of plumber’s putty to sell the basic muscle structures. Mocked up the basics on the base with some terrain bits, some natural root material, and some extruded foam. I’ll go in and smooth out all these details later with a slower setting sculpting medium. I needed to do this so the slimy shape of the slug body can really hug the terrain correctly.
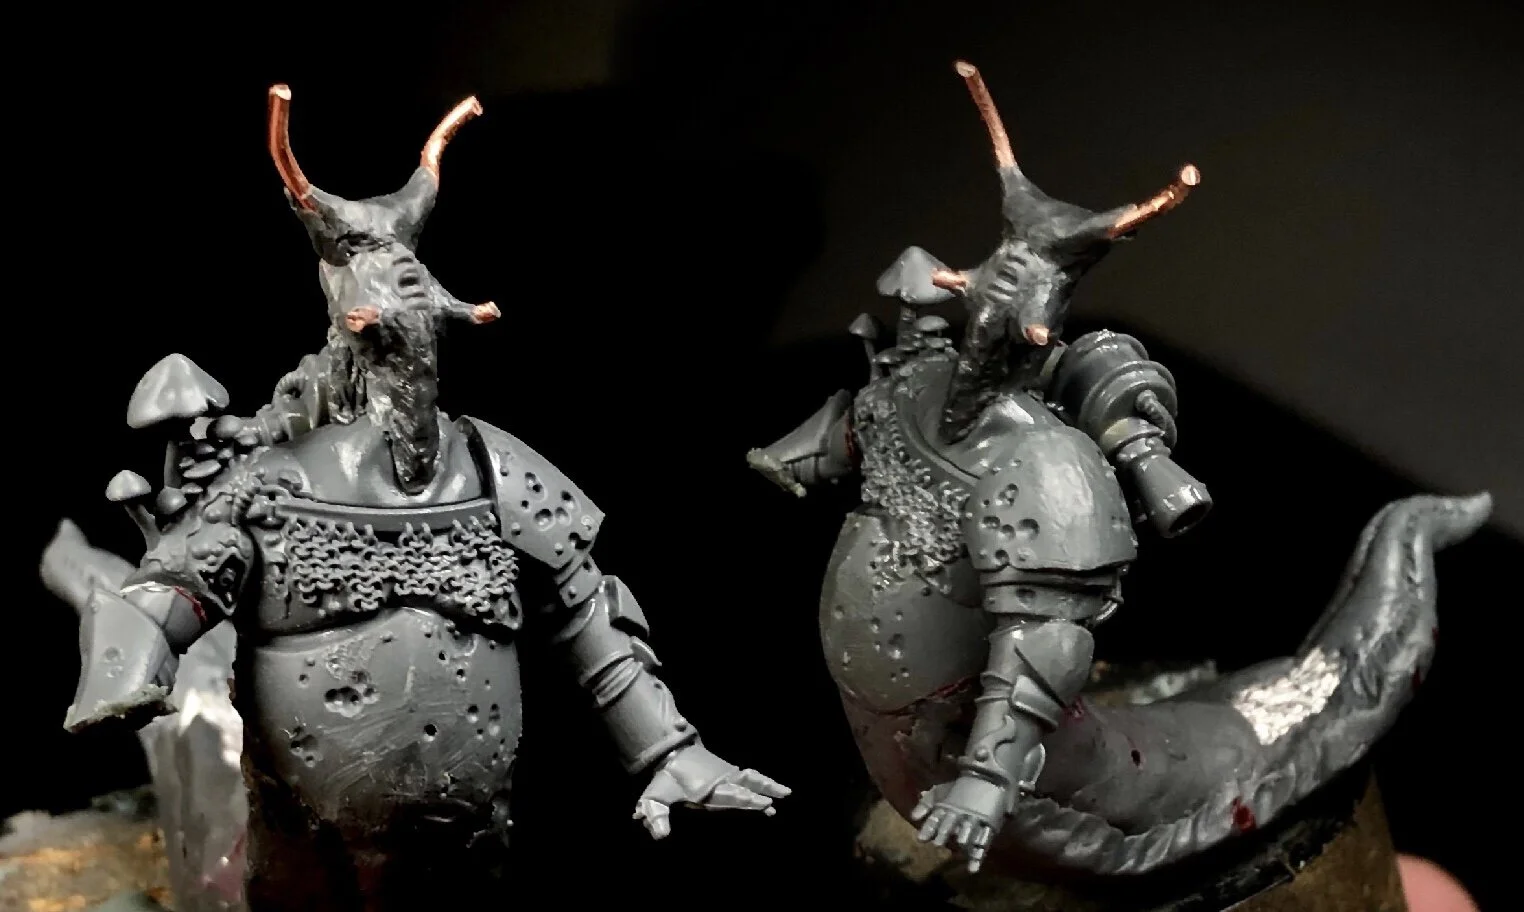
Working with plumber’s putty can be kind of tricky but it works well with my impatience. This stuff hardens quickly (rock hard in about 15 minutes) so I have to work super fast a simple. The head above, for example, is about 5 different cured passes of putty. This is great for building up underlying structures quickly but not so much on details. That type of stuff I’m saving for later!

After establishing the load bearing structures of the base, I can more properly define slug body. I try to mark the points on the model where the figure should be facing as well as were it will make contact. I also drill out a point for the main pin of the figure and try to make that as sturdy as possible because I’m gonna be back and forth fitting and refining. Plus a wobbly main connection is a PAIN IN THE ASS!! I coated the extruded foam and root material in s Matte acrylic medium and some random ink. The medium will act as a lite barrier between any glues or chemicals that might get on the foam and melt it as i continue to build. The ink is so i know what parts I’ve put the medium on.

I added 3 different ridges to the structure of the slug body and blended them in roughly with a lubricated tool. Got them both in there with one pass of putty each. A miracle. The end of the tail took an additional pass and anxiety as I tried to make sure it maintained a living fluidity and attached to the rotten tree correctly. Luckily I’ll be able to refine this later.

I also drilled out some points for pins in the mantel area of the creatures back for some additional vent details from what was once power armor. I've always loved the idea of an ascendant chaos marine and how it’s now corrupted form could assimilate and graft parts of its armor permanently into its biological form. More on that later haha.
I’m going to add some more mechanical details to the main body of the character next. Then its on to sculpting the more detailed bits with a proper putty. More soon, as well as logs of other projects my ADD brain flutters to and from. Cheers!